Need to Know
Yarn
Hooks & Notions
Measurements
Abbreviations
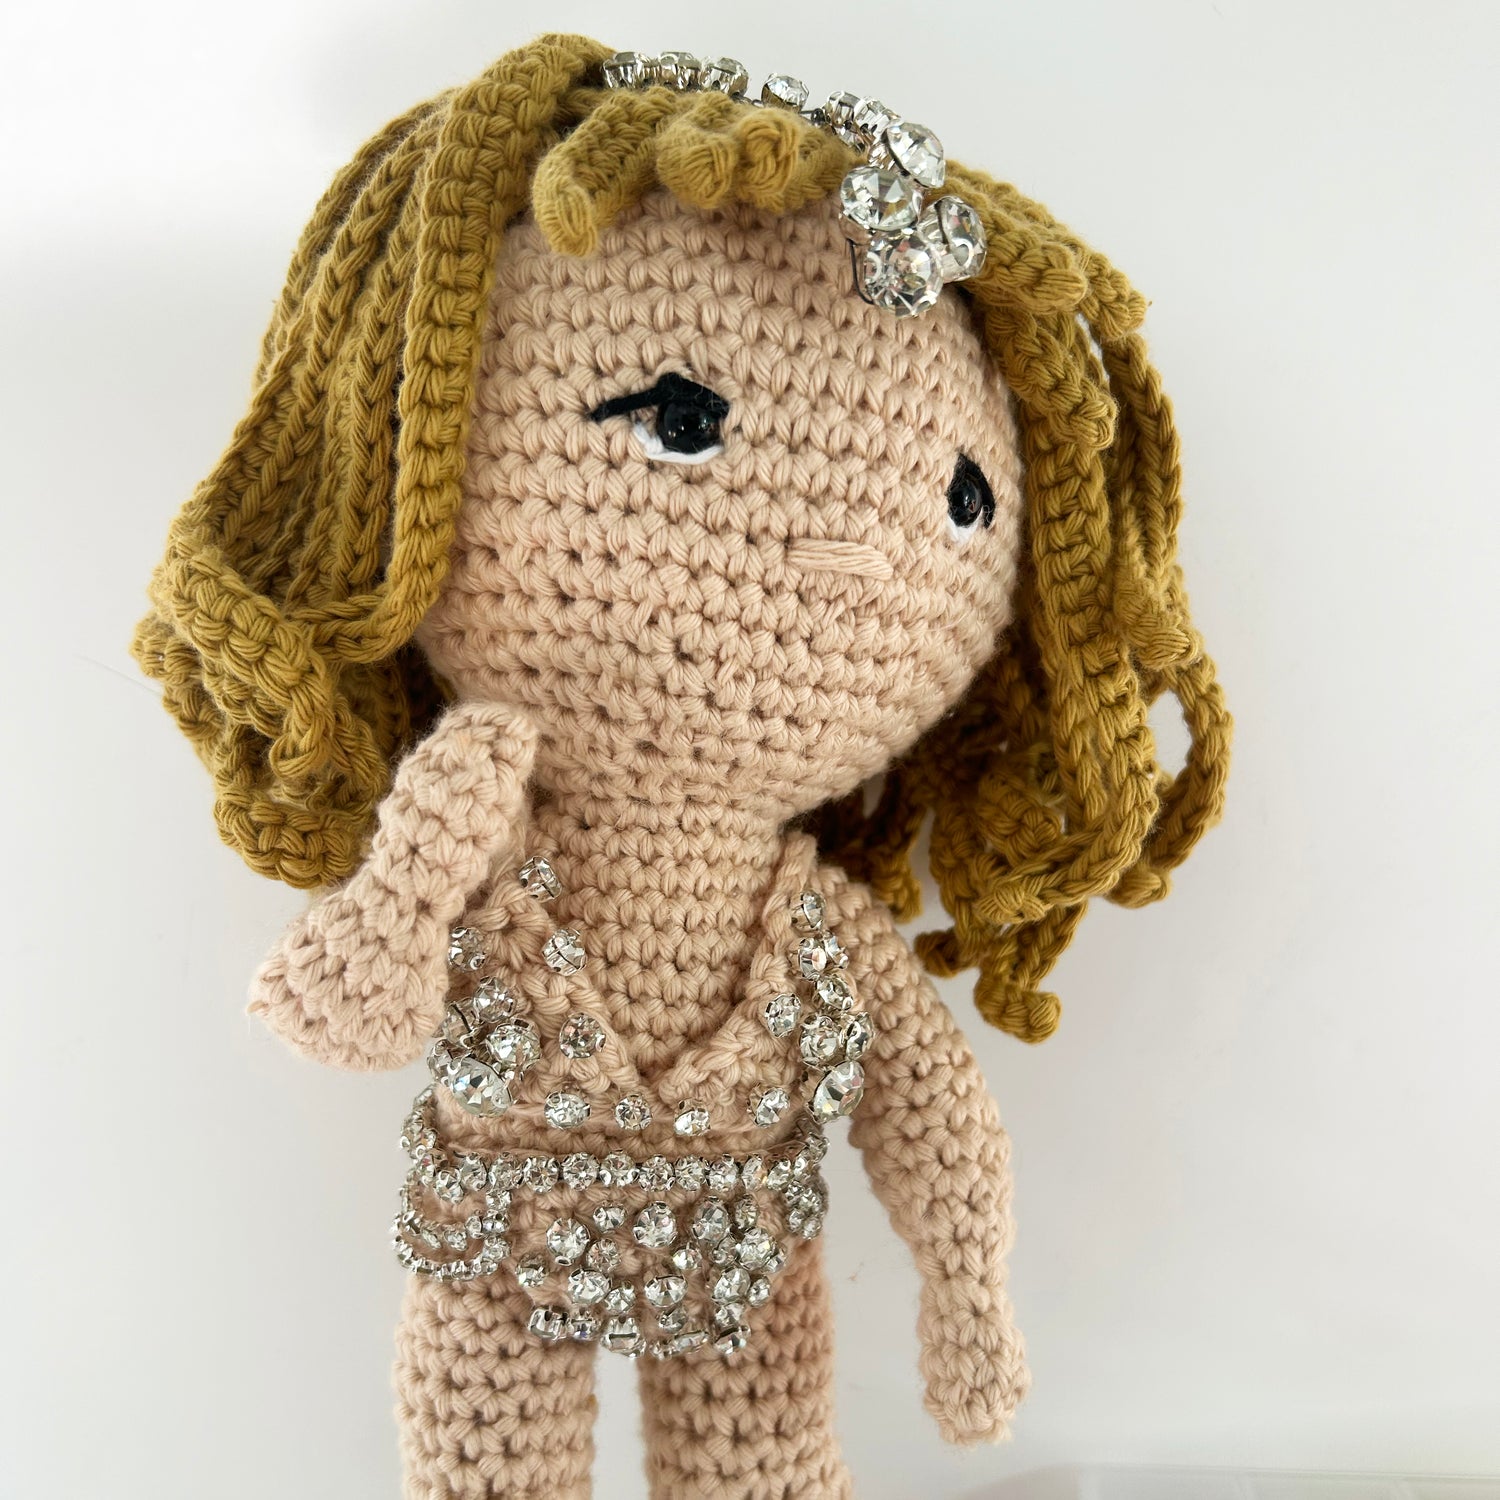
The Eras Tour has come to an end and we're welcoming The Life of a Showgirl with open arms. I am SO happy with the new album, I can't help but keep bopping!
To celebrate, I'm offering the 2nd outfit in the Taylorumi series for free! You can purchase the original doll pattern below, and as always, you can support me buy purchasing this pattern as well.
Video tutorial is incoming in the next few days.
Note: This pattern is unofficial, and I am in no way associated with Taylor Swift or her management.
Bottoms
You will work one side of the bottoms first, then work the other side out from the other side of the foundation chain row. Then join the tops of each piece together with one final round.
Using 4mm hook and body colour, ch 3.
Row 1: dc (sc) in 2nd ch from hook. dc (sc) in next ch. Turn. Turn. (2 sts)
Row 2: ch 1, 2 dc (sc) in first st, dc (sc) in next st. Turn. (3 sts)
Row 3: ch 1, dc (sc) in 1st st, 2dc in next st, dc (sc) in next st. (4 sts)
Row 4: ch 1, 2 dc (sc) in 1st st, dc (sc) in next 2 sts, 2 dc (sc) in last st. Turn. (6 sts)
Row 5: ch 1, 2 dc (sc) in 1st st, dc (sc) in next 4 sts, 2 dc (sc) in last st. Turn. (8 sts)
Fasten off. Attach into 1st ch of foundation ch 3.
Work as row 1-5 for second side. In rnd 6 you will attach th tops of the two sides together.
Row 6: ch 1, 2 dc (sc) in 1st st, dc (sc) in next 6 sts, 2 dc (sc) in last st. ch 4, 2 dc (sc) in 1st st of next side, dc (sc) in next 6 sts, 2 dc (sc) in last st. Ch 4, join into top of 1st st with sl st. (28 sts, 20 dc (sc), 8 ch)
Fasten off, weave in ends.
Top
The top is worked by started at the straps, working a chain and then working the top cups. You’ll make two of them before you join them together.
Using 4mm hook and body colour, ch 9.
Row 1: dc (sc) into 2nd ch from hook. Leave remaining ch unworked. (1 st)
Row 2: ch 1, 2 dc (sc) in same st. (2 sts)
Row 3: ch 1, 2 dc (sc) in 1st st. dc (sc) in next st. (3 sts)
Row 4: ch 1, 2 dc (sc) in 1st st. dc (sc) in next 2 sts st. (4 sts)
Row 5: ch 1, 2 dc (sc) in 1st st. dc (sc) in next 3 sts. (5 sts)
Fasten off. Weave in end.
Repeat row 1-5, but do not fasten off.
Row 6: ch 1, dc (sc) in each st, then take 1st cup and work dc (sc) in each st (make sure you are working it as if you had continued the 6th row as normal). ch 4, sl st into 1st ch of 1st cup, ch 3, sl st into 1st ch of 2nd cup, ch 4, join with sl st into dc (sc).
Fasten off and weave in ends.
Decorating
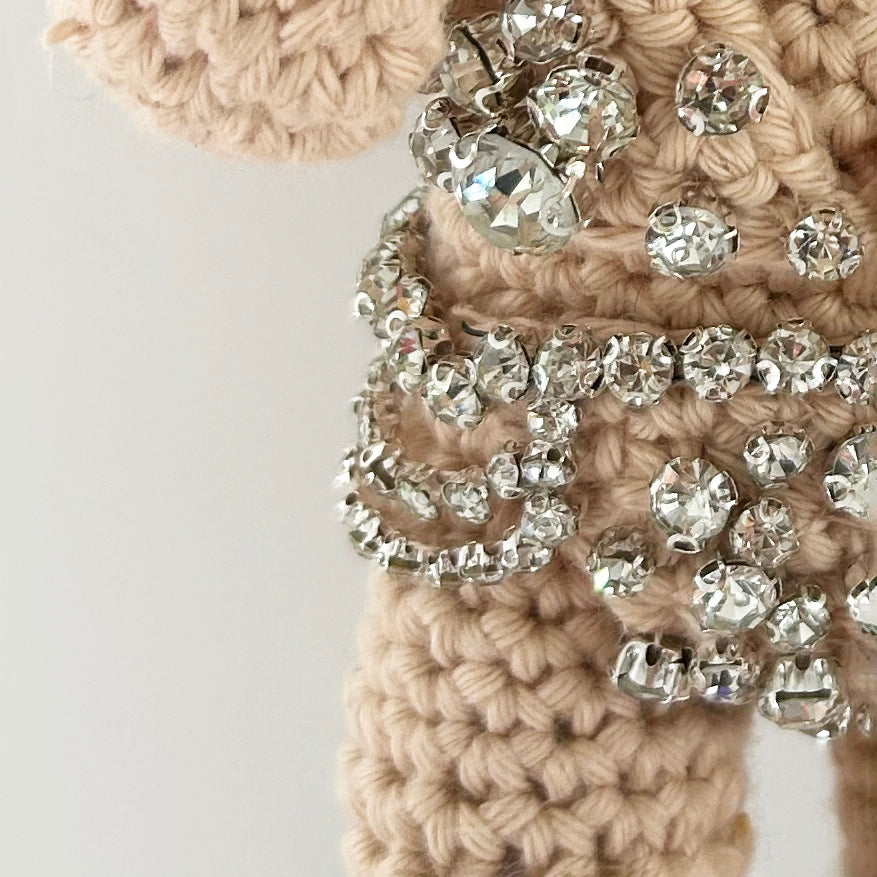
I opted to use sew on rhine stones as I could ensure they would be secure and create my own chains of them for around her legs. You can use glue-on rhinestones and also purchase ready-made strings.
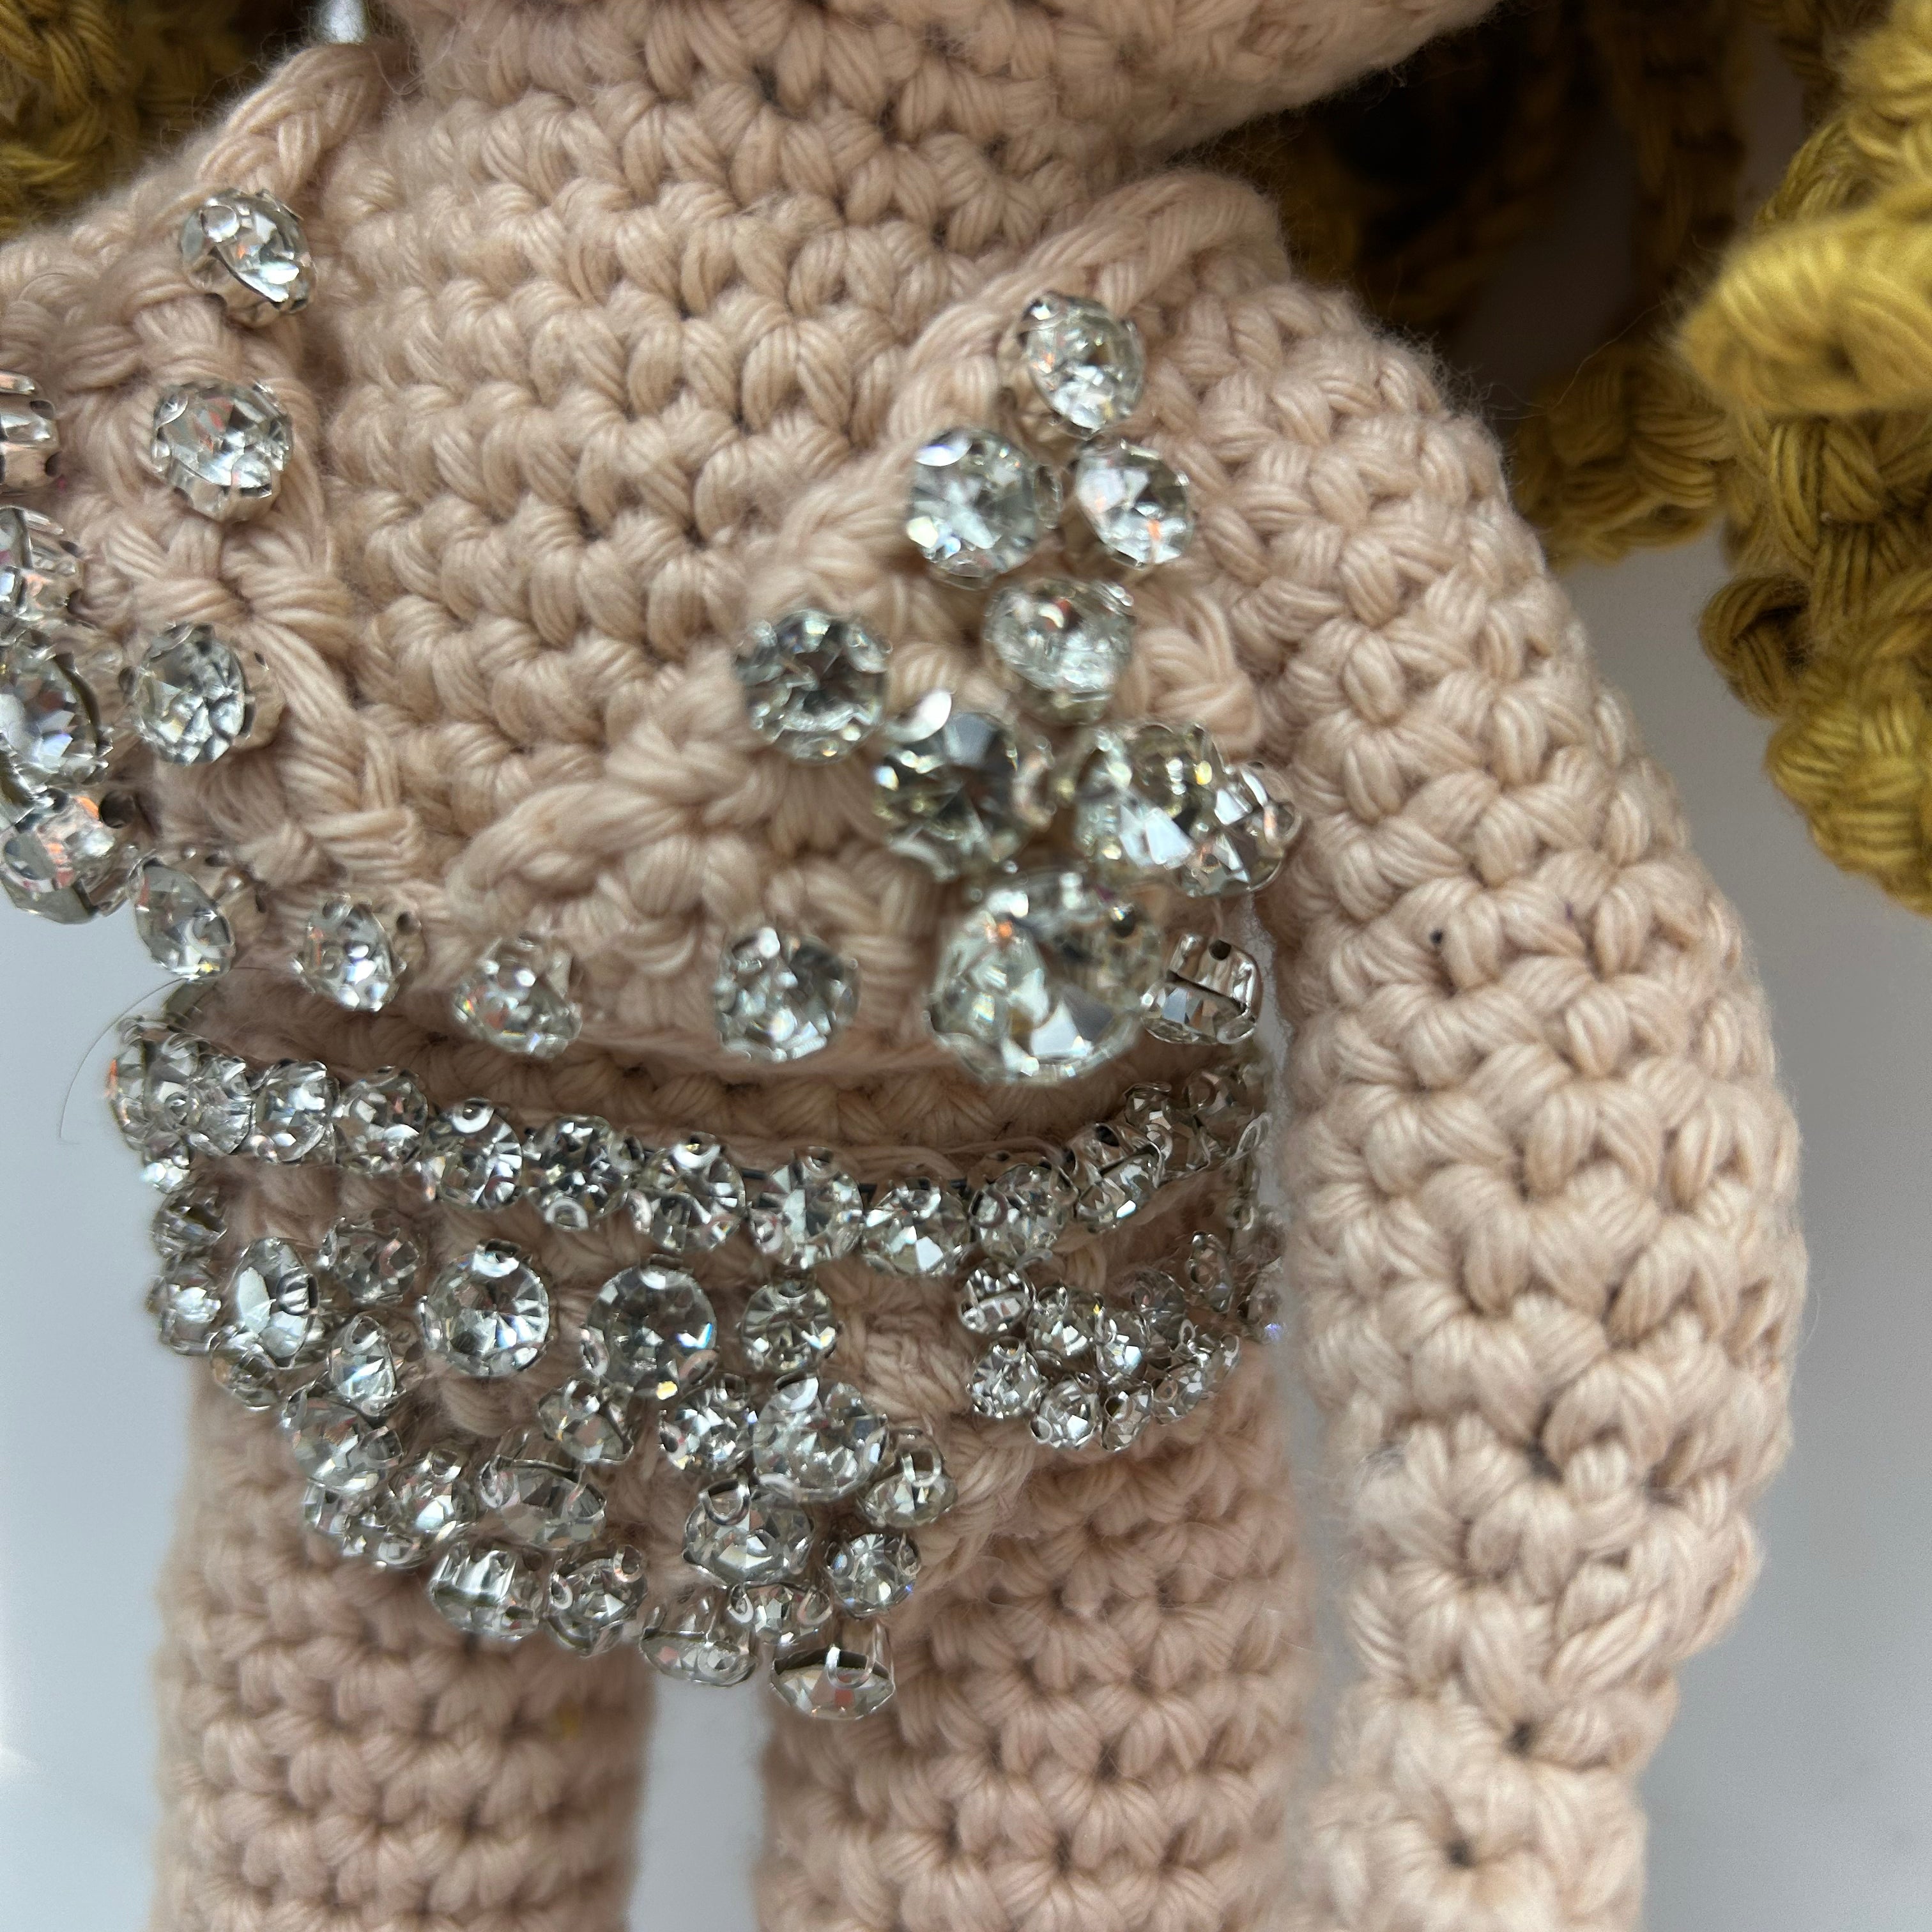
Decorate your top and bottoms however you like – I opted to use a line of 4mm rhinestones around the waistband and then place 4-5mm rhinestones around the front of the bottoms. I created strings to go on the side (see how on the next page).
For the bottoms, I using a 6mm, 2 5mm and a 4mm rhinestone to create a drop-type pattern and then placed other 4mm rhinestones around the edge, with a 3.5mm rhinestone towards the middle.

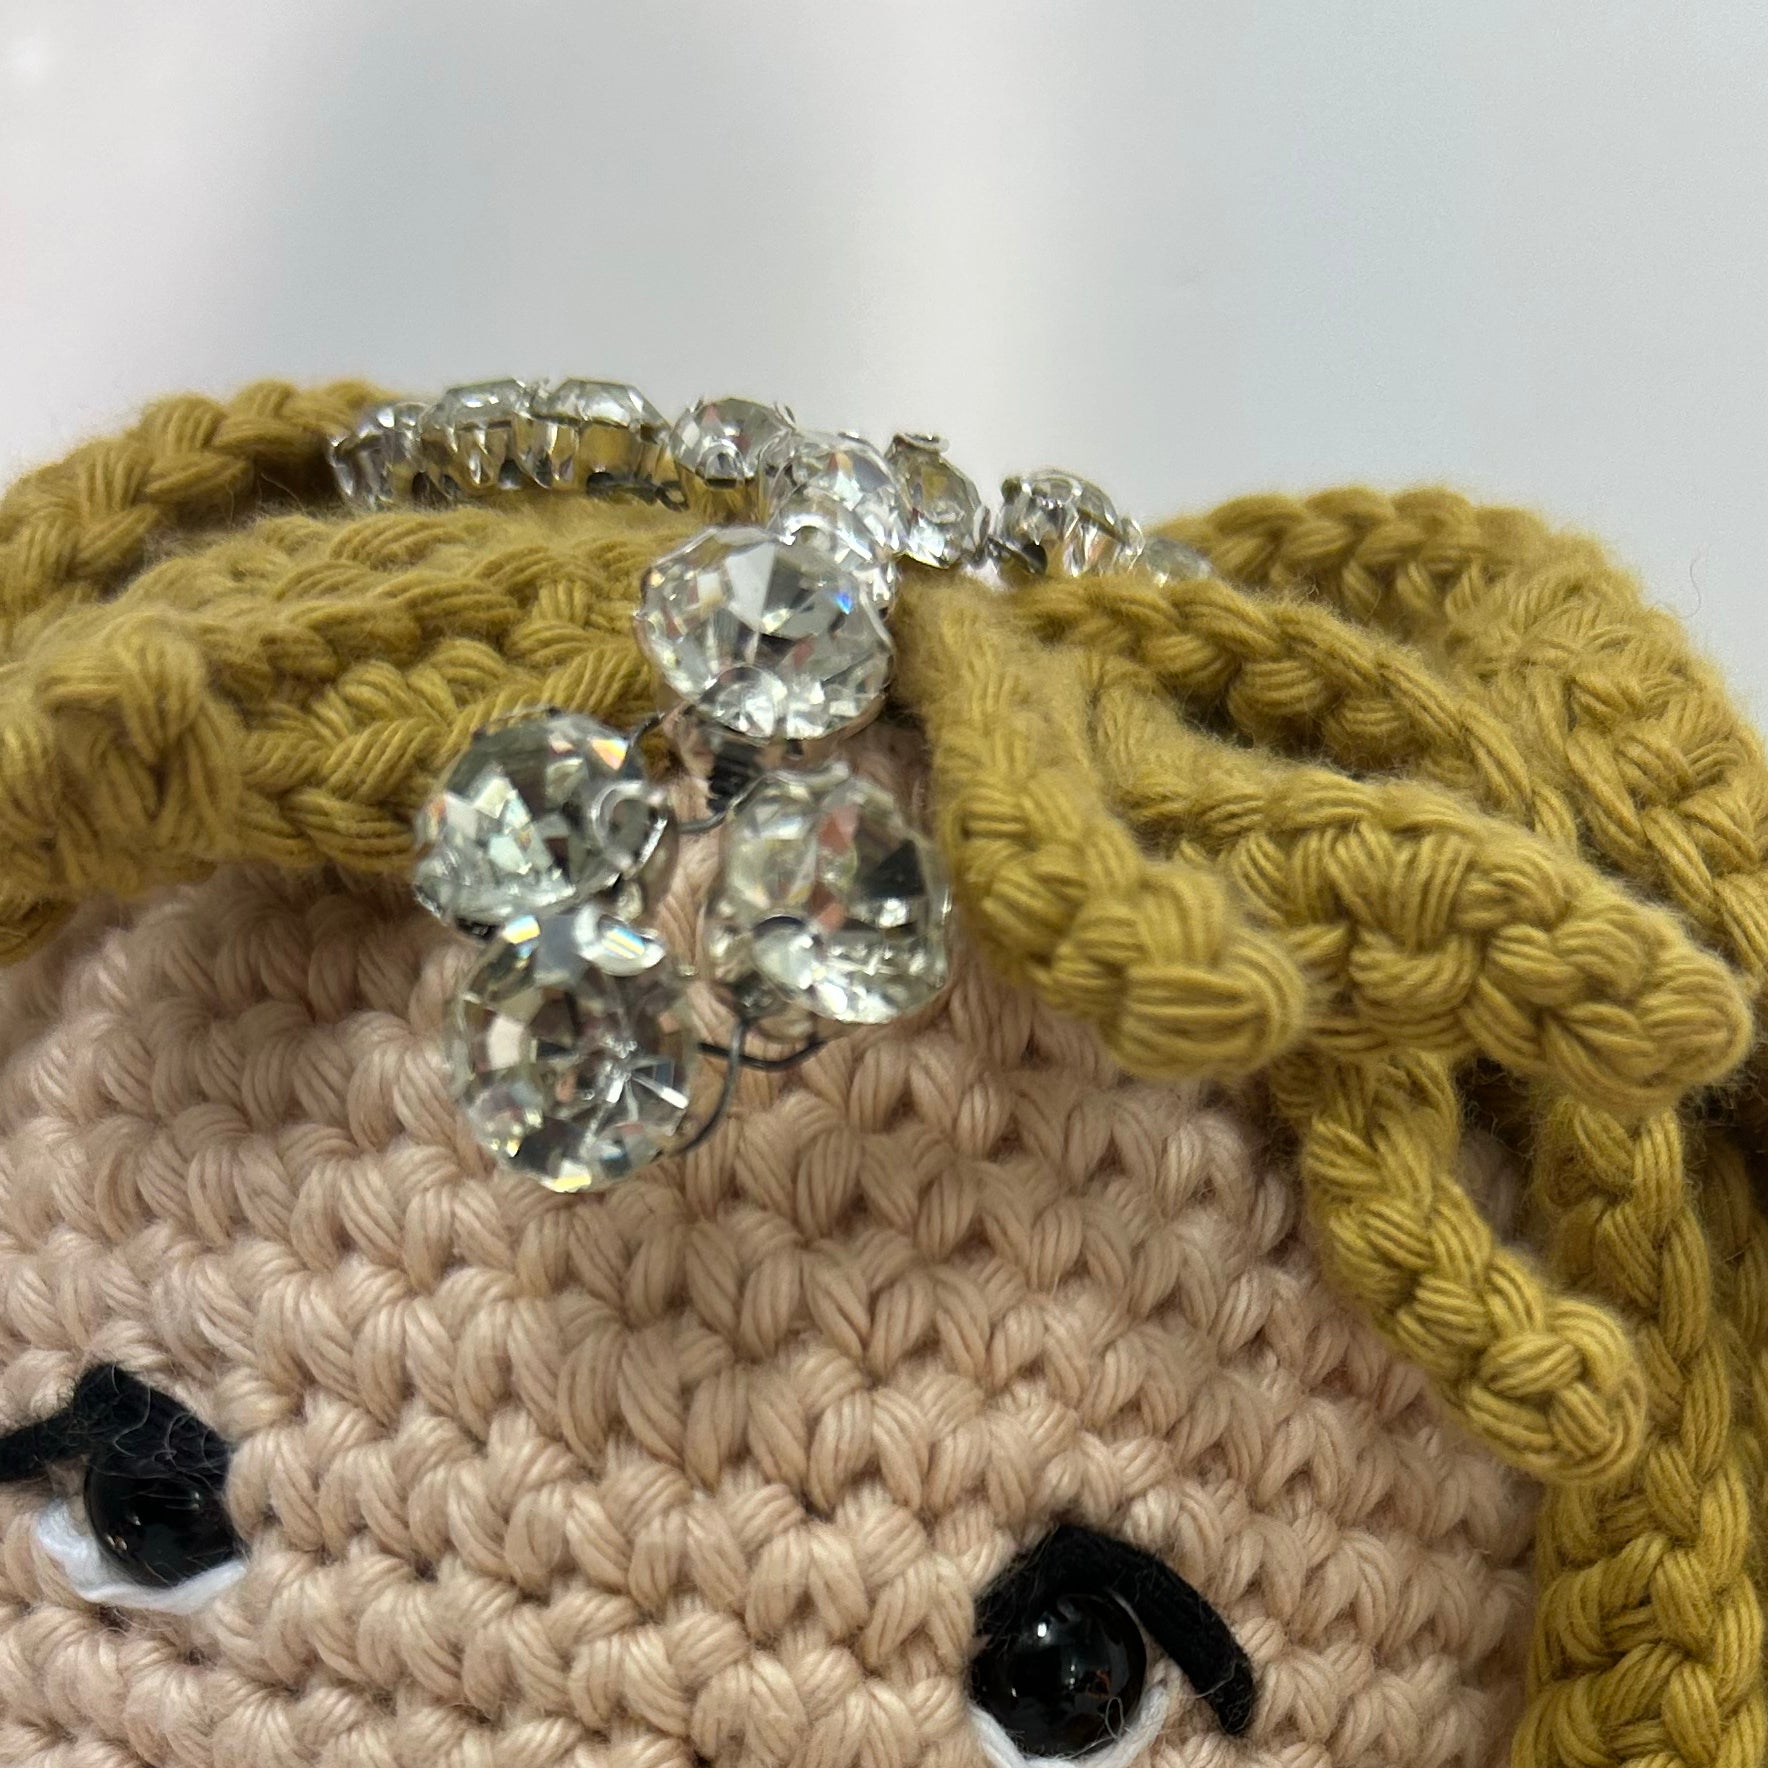
Headband
I am no jewellery maker… I opted to use wire to thread through the rhinestones, using 4 6mm rhinestones to form a diamond shape. I then used an extra strand of wire to go through each side of 4 rhinestones out to each side.
I then secured the wire into a loop, which can thread under her hair to stay in place on her head.

Creating Rhinestone Strings

Step 1: Lay your rhinestones face-down, laying them in line.
Step 2: Take a needle with 2 strands of thread (for extra strength!) and insert into the first rhinestone across 2 holes (not opposite each other, but to one side. I am using a contrast thread to make it easy to see. Use a thread that matches the body.
Step 3: insert into the second rhinestone through the holes on the same side.
Step 4: Now come back through the other side of the rhinestone, create a ‘track’ between the stones. Do you want it to be too tight, but equally not too gappy either.
Step 5: Come back up through the 1st holes from step 2/3.
Step 6: Now work into the next rhinestone, making sure to match up the sides.
Step 7: Come back down through the other side, also working through the 2nd rhinestone.
Step 8: Then work through the 1st side of the 2nd rhinestone again, then into the 3rd one.
Repeat step 6-8 until you have the length you want, this can vary based on rhinestone size.
To attach, work around the end rhinestones holes and into the crocheted piece. Repeat with any stones that will overlay the crochet.

Show Your Support
By purchasing the pattern PDF, you will be supporting my ability to provide even more free patterns and tutorials.

Buy me a 'Coffee'

You Might Also Like
-
Taylor Swift The Eras Tour - Colour Chart Pattern - PDF Only
Regular price From £5.00Regular priceUnit price per -
The Eras CAL
Regular price From £5.00Regular priceUnit price per -
Taylor Swift The Eras Tour (TTPD Version) - Colour Chart Pattern - PDF Only
Regular price From £5.00Regular priceUnit price per -
Taylor Your Own Dress - Crochet Pattern - PDF Only
Regular price From £5.00Regular priceUnit price per